Sun Kissed Skin.

Just got back from a trip to Spain, (which is Home from Home for me!), even though it maybe September, the sun was still blazing hot and I was still able to sunbathe next to our roof top pool.

My skin has been bothering me recently as I have been put on a gluten diet, so I can be tested for Celiac desise and gluten allergies, I have seen a dramatic difference since then and it’s been driving me crazy! It doesn’t matter the amount of products I use, the rashy/acne is still there. So I was hoping that some vitamin D would help, but still I was to patronide to go completely without makeup but didn’t want to lay it on thick, so I had to come up with something that covers up the flare ups but not going to Irritate my skin to much.

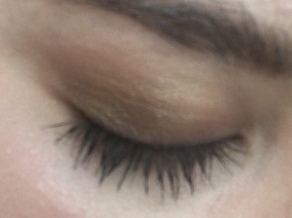
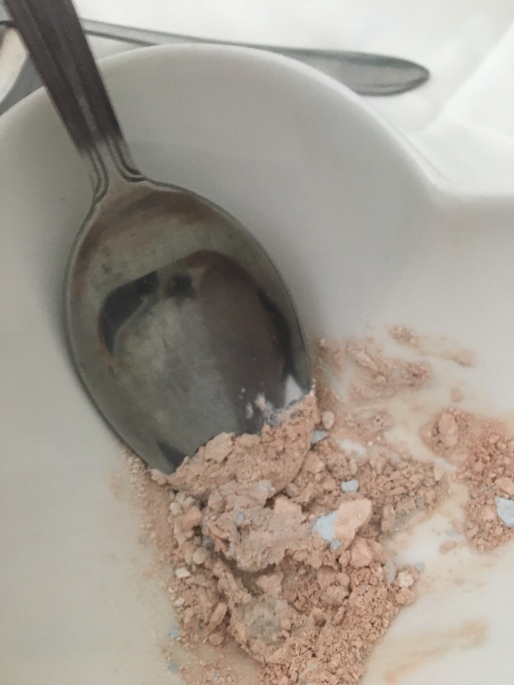
So after applying my sun cream to my face (which I know won’t help, but it’s too important not to wear it) I brushed the Maybelline Eraser Eye Concealer on areas that are worse, then I mixed my primer, L’Oreal Paris Bonjour Nudista Skin Tint (the nude colour and medium) In to a paste the apiled it to my T Zone area and blended in gently with my beauty blender. It actually works and I could go to pool without worrying for my Daily nap!

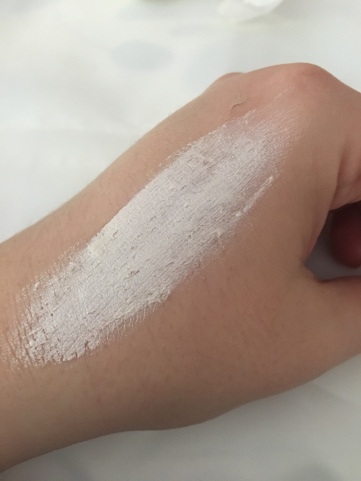
It actually gives a really good coverage without having to use any foundation and doesn’t feel as heavy on your skin. So sometimes it’s worth mixing and playing around with products! Sun Kissed skin.

Pool time!

I even manage to get dressed up and go for drink in the evening which is a real rare thing for me to do! I suppose the 3 hr naps I took in the afternoon made that possible!

Don’t forget to follow me on Instagram @surreygirlgrace (as I love to take pics!)

Lots of Love,

Grace

Xoxo

Arabia Eyes

I Love Love Love, the golden, glimmering eyes of the style of Arabic eyes. From the full brows to the winged eye liner.

Now that I am the very proud owner of the Huda Beauty Rose Gold palette, that has all the perfect essentials to create this look!

img_5297
Pintest inspo!
img_5296
Pintrest inspo!

My inspiration from Pinterest!

So here’s my take on Arabic Eyes,

Enjoy!:

Started with my Brows-

  1. Brush, Pluck
  2. Fill in with pencil
  3. Using Barry M “its a brow thing” lightly.
  4. Go round the edge of brow and line with pencil
  5. Brush them to smooth
  6. Use concealer around brow to frame.

NEXT-

PREP SKIN:

  1. serum
  2. moisturise

MAKE UP:

  1. PRIME
  2. ERASER Concealer
  3. FOUNDATION
  4. TOP UP CONCERLAR, BLEND
  5. HUDA ROSE GOLD- 1 SANDALWOOD, 2 HENNA 3 COCO, 4 TRUST FUND 5 MOON DUST 6 ROSE GOLD
  6. LINE EYE WITH RIMEEL WONDER SWIPE AND BOTTOM LASH
  7. FALSE LASHES
  8. HIGH LIGHT, CONTOUR!

(I wrote this as I was doing it, so sorry for the capitals!)

  • img_5293
    This What I achieved!


Hope you enjoyed this quick post!

Love,

Grace

XOXO


The Duchess look.

I’m completely in love with our royal family, here in the UK. Especially the Duke and Duchess of Cambridge.

So I’ve dedicated this post to my favourite regal lady! Cathrine, has a very effortless look, that can be used in every occasion needed. From state dinners to meeting charity workers, it suits her and it looks natural.

img_5096-1

So here’s my guide to The Duchess look:

Step 1: Skin Prep- washed my face with the Body Shop, drops of light, then also used the face cream and serum from the same collection.

Step 2: Make-up time! – starting with my eyes, I used primer on my eye lids and put concealer under my eyes and blended in, next I filled in my brows with my a pencil, now time for the shadow, using my Urban Decay Naked 2,Basic Palette, I mixed the 2nd and 3rd (Stark and Frisk) and blended up to my brow bone,

Next up, I used my Trifle, Praline palette to add a bit shimmer, so I used I mixture of the two last colours, blended from the outer eye inwards. Then time for the eye liner, using my Charlotte Tilbury brown liner, on the top and bottom of my eyes. Lastly for the eyes mascara, I used my KIKO mascara, trying hard not to make it clumpy.


img_5110
Eye stage complete!

Step 3: using my fingers, I blend my L’Oréal nudista, on my cheeks, forehead and chin, next I use my foundation, and blend in all over with my brush then go over it with beauty blender sponge, then on to the peachy cheeks! Mixing Zanzibar from the Huda Beauty highlighter palette and Dandelion from my benefits cheek palette, dab on to cheek area, then again from the benefit palette, I topped it of with the shade California on top. Then for a little subtle highlight, using the PS highlighter palette from Primark, just sweep the three shades gently above cheek bone.

Step 4: Lips! Using my Avon lip stick all over my lips, then lastly using my Charlotte Tilbury Beach Stick, in Formentera, in dented of the lips!


The finished look!


I hope you have enjoyed this Regal post!

Love,

Grace.

XOXO


Do I look Disabled to you?

Last week I adventured out to see Jay-Z and Beyoncé latest Tour ONTii. I’m a massive fan of them both and totally accept being bed bound for the next week or more to see them perform.

My sister came with me, and we got disabled seats, which were just fantastic. Perfect view of the stage, by the toilets and drink stands, could not asked for a better location.

Off course I had a face full of makeup, to hide my very ill looking features. I also always carry my doctors letters and proof of my disability with me, because you never know if anyone is going to ask you to prove your disabled or not.

All the staff at the Olympic Park Stadium (AKA the new WestHam stadium!) were fantastic and never questioned that I shouldn’t belong in the disabled seating.

But I couldn’t help thinking people were judging me, staring at me, thinking “why is she sitting with in the disabled area, when she looks like she has nothing wrong with her?” It always makes me question myself, when I know I shouldn’t, I have every right to be there. Just because I don’t have physical disability or in my wheelchair, I know I get judged. Sometimes I feel like I should have a big badge on saying “Yes I’m disabled, I even have proof, so SOD OFF!” Maybe it could be a new business venture! Haha!

So my point is, never judge someone for being different or looking “normal” because we know when we are being judge, and it’s really not appreciated. Just because I have a disability or several! Doesn’t mean I have to miss out on life or fun things?! Maybe it’s all in my head, but I know when I go out with out any makeup on, looking like I haven’t showered (which sounds horrible but showering is really hard for me sometimes) I know people stare and keep away from me like if I Ebola or the plague. It’s just not a nice feeling, when you are already feeling so ill.

Don’t judge me or anyone in society when you have no idea about our story.

I hope everyone has a good week, and I really recommend seeing Bey and Jay-Z!! It was amazing!

Love,

Grace

XOXO

DIY- How To Make A Cream Eye Shadow.

It seems that “Rose Gold” and “Metallics” are the colours that are every where at the moment, especially in the Make Up world.

I don’t want to break the bank at the moment, so I decided to make my own (again! but last time I made a highlighter!). I’ve been really wanting a “Rose Gold” themed palate, so why should I buy a whole palate, when I just want one colour!? So it’s to experiment again!

This how I got on and what I achieved:

What I used:

  • Small clear Pot
  • old eyeshadow. (I used an old Kardsahian Palate!)
  • squeeze highlighter (I used my Trusted L’Oreal Paris one!)
  • Squeeze of primer
  • small pot to mix (I used acid from my dry shampoo!)
  • something to stir with.
  • make up wipes (as the powder can get everywhere!)

Now Its Time to Mix!

  1. First I scraped the colour that I wanted in to pot. (I used the whole sparkly silver, a little of the first white and little of the blush at the right)
  2. broke them up till all the lumps have gone, then added squeeze of highlighter and a squeeze of Primer, then mixed into a paste.
  3. Next I put the powder paste in to the clear pot and flattened down with a top of a pen.
  4. Lastly, I put a make wipe over my finger and smoothed the paste.

And there you have it, A cheap, easy and quick eyeshadow thats the perfect colour just for you!

You can use any colours and any products with this technique!

Hope you enjoy making yours!

Love,

Grace.

XOXO

Drug store Beauty Haul.

I have been wanting to buy certain products online, but the prices on some of the products are just to extreme for me, when there are similar products for sale at my local drug store (aka Boots!)

Summer is practically here so I want to say good bye to pretty blush look and hello to the golden bronze. I really wanted some bronze liquid highlighter or custom drops. Also I wanted a base for my foundation that was tinted with bronze glow.

At first I went to the higher end products that the store sell, but I just could not find what I was looking for and was slightly disappointed.

So then my eyes where drawn to the brands like L’Oréal and Maybelline, Bingo. I found what I was after!

New Products! 

I got some fab products for reasonable prices!:

From Primark:

  • Two Face masks.

(Holler and Glow, Holler unicorn, I haven’t tried these out yet but my baby cousin and I will try them when we have pamper evening!)

From Boots:

  • Glamglow Bubblesheet Mask!

(It’s insanely good, I noticed a difference in my skin straight away, it’s starts to foam as soon as you place it on your face, then after three minutes remove and you are left with a cream like residue, which you rub in them rinse off! I loved it! Definitely by there products again!)

  • Colab Dry Shampoo in Unicorn, (it was Half price, I’m a sucker for anything unicorn and it smells great! )
  • Maybelline Prime Master. (At the moment in Boots you get a free “Bag Goal” product when you spend over a certain amount, inside the bag it has a pair of tweezers -they’re good ones by the way! brow stencils and a brow brush! )

(The Primer is quite a creamy, thick primer, but I quite like it and it feels nice on my skin)

  1. L’Oréal Paris Bonjour Nudista Skin Tint.( I have been using in mixed in with the Maybelline primer and also adding a little of the liquid bronzer, which gives my skin a dewy look)
  2. L’Oréal Paris Bonjour Sunshine Liquid Bronzer
  3. L’Oreal Paris Glow Mon Amour Highlighting Drops 02 BELLINI ( You don’t need much and it blends so well! It’s the bronze colour for a summer glow!)
A quick look I created using the new products!


I hope you have enjoyed this post!!

Love,

Grace

XOXO

How To- DIY Highlighter!

I love, love, love Highlighters!

So I when decided to make my own, I was so excited, especially when I realised I had everything I needed all ready at home.

So if you want to have a go at making your very own cream highlighter, here are my step by step guide.

What you will need:

  • An old or at end of use powder highlighter (I used my L’Oréal powder palette)
  • Body Lotion ( I used Jack Wills English Velvet lotion, it smells amazing!)
  • A bowl
  • A fork and a spoon.
What I used.

Step One– using your fork, scrape the contents of the powder highlighter in the bowl.

Step 0ne.

Step Two- squeeze some lotion in the bowl with powder and start to mix, you will need to keep adding more lotion as you go until you create the right consistency.

Step two.

Step Three– Mash up the highlighter until all of the lumps have gone and it’s now a smooth paste.

Step Three

Step Four- using a makeup with clean the original powder box, so you can fill with the new cream highlighter.

Step four

Step Five– using the other end of either you fork or spoon scrape and smooth the mixture into the original pallet.

Step five

And there you have it, your very own cream highlighter, that’s smooth and smells great!

Final Product 

Stay tuned for more DIY guides!

Love,

Grace.

XOXO

The Primark Look.

I recently went to my local Primark, saw the make-up stand and instantly had the urge to purchase. I have never tried using there make-up before, so I was eagerly excited to try it out.

DSC_0234
What I brought from Primark.

The first thing that caught my eye was the packaging, I thought this looks very familiar, then it came to me, the contour and hight kit looks a lot like Kim Kardashian’s make-up brand packaging. Also the lip kits look just like Kylie Jenner’s Lip Kits, but of course being Primark, the price is extremely different, which I’m not going to complain about! The Contour and Highlight kit was £8 and the lip kit was £3!

I adore the make-up I already have, I couldn’t wait to add it to my collection and try it out!

So this is step by step what I did, used whilst incorporating the primark make-up:

Step one sheet face mask.(This one I had in the cupboard for a while, from TKMAX!)

Fcae mask
Step one- The mask I used.

Step two- primark prime spray ( Only £2!)
Step three- Gosh cover and conceal foundations in 002 on eyes
Step four highlight brows using primark nude contour kit.
Step five HUDA BEAUTY Golden Sands 3D Highlighter Palette ,Zanzibar all over lid, Seychelles in inner corner, then Tahiti in crease.
Step six use kylie Jenner lip gloss, King K as eyeliner

Step seven –use Gosh 002 again all over face
Step eight- use primark higlter stick under eyes in a triangle shape towards the nose and sweep the stick on your temple on forehead, use the sponge end of brush the kit came with to blend
Step eight- use fenty beauty foundation in shade 150 and blend into the rest of face, use extra foundation to cover any blemishes by dabbing
Step nine- use primark nude kit contour stick, swipe above jaw line, use the sponge to blend then brush over with the other end of brush
Step ten- add blush to apples of cheeks, I use benefit cheek parade pallet, rockateur , using same pallet hoola lite on jaw line
Step eleven- using the primark fan highlighter brush, sweep huda beauty 3d pallet Seychelles across cheek to temple, using same brush blend Tahiti under cheek.

IMG_3947
Step eleven 

Step twelve- use primark nude lip kit in mesmerise, line lips using lipliner in kit and contour lips then apply the gloss, in center of lips sweep kylie Jenner gloss that use on eyes and blend.


                This is the finished look

Conclusion:

I loved the brow highlighter, the contour stick and the brush! but not sure about the highlighter stick, not sure if it was strong enough, that’s why I had to add my Huda Beauty highlighter. The prime spray is defiantly something that i’m going to continue to use, it was none greasy and oily on my skin, I most of all it was light, I find most primers quite heavy, thick and for £2 you just cannot go wrong!

I hope to do a blog on this post very soon, if you have any tips on using any of these products I would love to hear them!

I hope you have enjoyed this post, I absolutely love trying new products and looks!

Love,

Grace

XOXO